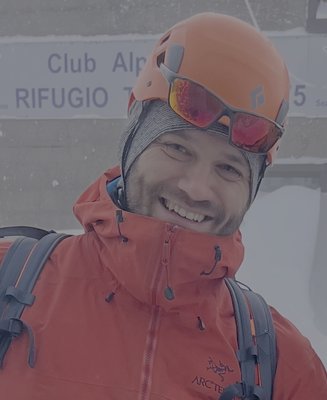
A mountaineering layering system has four parts: a wicking base layer (merino or synthetic, never cotton), a breathable active insulation layer you climb in, a warm static insulation jacket (the "belay puffy") you throw on over everything at every stop, and a shell that blocks wind and precipitation. Add a matching system for legs, hands, head and eyes. Start cold, vent before you sweat, and put the puffy on the second you stop moving.
Why layering matters more on a mountain
On a summit day your heat output swings wildly. Climbing steep snow with a pack, you produce a lot of heat and sweat. Ten minutes later you are standing still on an exposed ridge while your partner places a screw, and the same body is cooling fast. One big jacket cannot handle both states. A system of thin, specialised layers can, because you add and remove pieces to match what your body is doing right now.
The environment makes it harder. Air temperature drops by roughly 6.5°C for every 1,000 m of height gain (about 3.6°F per 1,000 ft), which is the standard atmospheric lapse rate. A pleasant 20°C (68°F) day in a valley at 1,000 m (3,300 ft) is close to freezing at 4,000 m (13,100 ft) before you even count wind. Wind then strips heat on top of that: at an air temperature of -10°C (14°F), a 30 km/h (19 mph) wind gives a wind chill of roughly -20°C (-4°F). Wet clothing makes all of it worse, because water conducts heat away from the skin far faster than dry air.
So the whole job of the system is two things: keep the layer next to your skin as dry as possible, and have enough trapped warm air available instantly when you stop.
The four layers, and what each one does
Legs
Legs run warmer than the torso because they do most of the work, so they need fewer layers. A typical setup is a light base layer bottom (skipped on warm days), soft shell trousers as the main layer, and hard shell overtrousers with full-length side zips so you can pull them on over boots and crampons. On big, cold, high-altitude peaks, insulated trousers or a down suit replace part of this.
Extremities: hands, head, feet, eyes
Hands and feet are where cold injuries happen first, and where a mistake is hardest to recover from.
- Glove system. Think in three levels: a thin liner glove for dexterity and warm moments, a mid-weight glove for most climbing, and warm mitts for the cold start, rest stops and summit. Mitts are warmer than gloves because your fingers share heat. Carry a spare pair of gloves; wet gloves on a summit day are a common problem, and keeping a dry pair inside your jacket is cheap insurance.
- Head and neck. A thin beanie that fits under your helmet (check the fit at home, not at the hut), plus a buff or neck gaiter for wind and sun. The puffy's hood should fit over the helmet too.
- Feet. One good pair of wool or synthetic mountaineering socks that fits your boots without squeezing your toes. Tight is cold: compressed socks and boots restrict circulation. Keep a dry pair for the descent or the next day.
- Eyes. Glacier glasses with category 4 lenses and side protection. Snow reflects a large share of UV, and the dose rises with altitude, so snow blindness can happen on a cloudy day. Category 4 lenses are too dark for driving, which tells you how much light they block.
How to layer through an alpine summit day
The kit list only matters if you use it well. Here is how a typical alpine start day plays out.
1. Leave the hut cold
The classic rule is "be bold, start cold." If you feel comfortable standing outside the hut at 2am, you are wearing too much. Within ten to fifteen minutes of uphill walking you will be warm. Typical start: base layer, active insulation, soft shell or hard shell depending on wind, thin gloves or mid gloves, beanie under the helmet. The puffy stays at the top of your pack.
2. Vent before you sweat
Open zips, pull off the hat, swap mid gloves for liners. Make small adjustments early rather than one big change after you are already soaked. A damp base layer will chill you hard at the next stop.
3. Puffy on at every stop
The moment you stop for more than a minute or two, the belay jacket goes on over everything, hood up if it is windy. Do not wait until you feel cold: by then you have already lost the heat you built. When you start moving again, keep it on for the first minute, then take it off before you sweat. This one habit prevents more cold problems than any piece of gear.
4. Summit and ridge wind
Summits and ridges are where wind is strongest and where you are most likely to stand still. Hard shell on, mitts on, buff up, puffy over the top if you are stopping for photos. Cold plus wind also slows your thinking; the hypothermia and cognition guide explains why the first sign of getting cold is often a worse decision, not shivering.
5. Descent in sun and soft snow
The descent is often the opposite problem. The sun is up, snow reflects heat and light back at you, and in a sheltered glacier basin it can feel hot even at altitude. Strip to base layer and soft shell or even just the base layer, keep sunglasses on, add sun cream, and drink. Keep the hard shell and puffy accessible though, because cloud or wind can turn it cold again within minutes.
What to wear by situation
Temperatures below are indicative for a summer Alpine-style 4,000 m (13,100 ft) day. Real conditions vary a lot by season, range and weather, so read the forecast for your altitude and adjust.
| Situation | Typical feel | Torso | Hands and head |
|---|---|---|---|
| Night start, below freezing | -5 to -15°C (23 to 5°F), often calm | Base + active insulation + soft shell. Puffy packed on top. | Mid gloves or liners, beanie under helmet, buff |
| Moving uphill | You feel warm after 10 to 15 min | Base + active insulation, zips open. Shell only if windy. | Liners, hat off or swapped for headband |
| Rest stop | Cooling fast within minutes | Puffy straight on over everything, hood up | Mitts, beanie back on |
| Summit or ridge wind | Wind chill can feel 10°C (18°F) colder or more | Base + active insulation + hard shell, puffy over the top when static | Mitts, buff over face, hood over helmet |
| Descent in sun | Can feel warm, around 0 to 10°C (32 to 50°F) or more in sheltered spots | Base layer + soft shell, or base layer only | Liners or no gloves, sun hat or buff, cat 4 glasses |
Examples by peak type
The same four-layer logic scales from a single summer day to a multi-week expedition. What changes is how much insulation you need and how wet or dry it is.
Alpine 4,000 m glacier day
Peaks like Mont Blanc at 4,806 m (15,768 ft) and Gran Paradiso at 4,061 m (13,323 ft) are classic examples. The standard four layers work well: merino or synthetic base, grid fleece, a mid-weight puffy (down or synthetic), and a light hard shell. Legs get soft shell trousers with overtrousers in the pack. Single or light double boots depending on the season and route. The real challenge is the swing from a cold night start to a sunny glacier descent.
High-altitude expedition peaks
On Mera Peak at 6,476 m (21,247 ft), Aconcagua at 6,962 m (22,841 ft) or Denali at 6,190 m (20,308 ft), the cold is deeper and lasts longer. Summit days can run well below -20°C (-4°F) before wind chill. The system gains an expedition down jacket (much warmer than an Alpine puffy, often worn while moving on summit day), insulated or down trousers, expedition mitts, and double boots with insulated liners, often with overboots or integrated gaiters on the coldest peaks. Read the altitude acclimatisation guide too, because the cold feels much worse when you are under-acclimatised and under-fuelled.
Volcano summit
Equatorial volcanoes like Cotopaxi at 5,897 m (19,347 ft) combine a midnight start, a long steady glacier climb, and strong summit winds. Expect a cold, exposed night and a fast warm-up on the descent. A warm puffy, a good hard shell, mitts and a full face buff do most of the work, usually with double or warm single boots.
Train in the kit you will climb in
Layering is a skill, not a shopping list, and your long training days are the place to learn it.
- Carry the real pack. Train with a pack that holds your actual summit kit: puffy, shell, spare gloves, water, food. The weight and bulk change how you move. The weighted pack training guide covers how to build up the load.
- Practise layer changes. On cold long days, time how long it takes to get the puffy on, swap gloves for mitts and get moving again. Do it with gloves on. Clumsy changes become fast changes with repetition.
- Test your sweat rate. Notice how quickly you start sweating at your uphill pace in your climbing layer. That tells you how cold you should start on summit day.
- Fuel and drink with cold hands. Eating keeps you warm. Practise eating small amounts often with mitts on; the fuelling calculator gives you a starting target for a long day.
Fitness matters for warmth too: a climber moving at a steady, sustainable effort sweats less and stops less often.
Build the fitness behind the layering
Train to Mountain builds a training plan around your peak and summit date, recalculates it every week on Sunday, and connects with Garmin, Suunto, Coros, Polar and Apple Health. Long days and pack sessions are where you practise the layering routine above.
Common layering mistakes
- Starting too warm and soaking the base layer in the first hour.
- Waiting to feel cold before putting the puffy on at a stop.
- A puffy that does not fit over the shell and harness, so you never actually wear it when it matters.
- Only one pair of gloves, which gets wet on the way up and stays wet.
- Cotton anywhere in the system, including underwear and socks.
Tools and deeper reading
- What is an alpine start? The day this layering system is built for.
- Hypothermia and cognition: how cold affects decisions before you notice it.
- Altitude acclimatisation: why the cold bites harder high up.
- Training with a weighted pack: build up to carrying your real kit.
- Fuelling calculator: how much to eat on a long cold day.